- Posted on
- By IASUS_CONCEPTS
- In Information

HOW TO USE A THROAT MICROPHONE
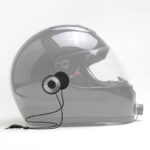
How Does the NT3-R and GP3-R Throat Mic Work?
IASUS Noise Terminator throat mics are different from conventional headset communication systems. Standard boom microphone systems are based on traditional acoustic induction from sound waves in the air. By contrast, NT3-R microphones pick up voice signals via vibrations generated by the user’s larynx through an aluminum transponder that rests on just off the center of the throat. This way, our throat mic systems “eliminate” background noise by simply not picking them up, making NT3-R ideal for use in noisy environments and in situations where quiet, covert communication is necessary.
A lot of throat mics use a double-transponder design in which each transponder rests on either side of the throat. This is not ideal, because most people do not have perfectly symmetrical necks, which leads to an imbalance of the transmission wavelengths from each transponder and causes distortion. IASUS has engineered the NT 3 with a single transponder that hits the “sweet spot” about 1 to 2 inches from the center of your throat.
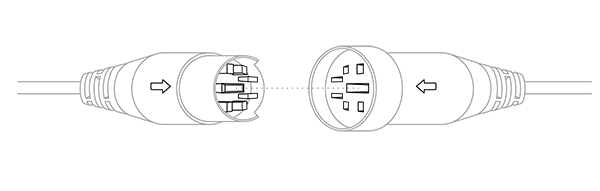
How to Connect the Adapter to the Throat Mic (NT3-R and GP3-R)
Plug the throat mic into the M2 Adapter (G, sold separately) using the DIN connectors (D). Be sure to align the arrow indicators before firmly pressing them together to avoid bending the pins.
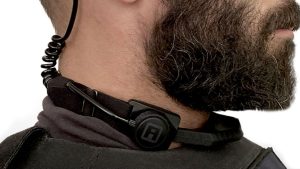
How to Wear a Throat Mic?
For the best transmission quality when using the NT3-R, place the Gen 3.0 Transponder Microphon (A) about 0.5 – 1 inch on either side of your larynx / voice box. The optimal transponder position on the neck will vary between individuals. The NT3-R’s neck strap is adjustable. To increase or decrease the diameter of the strap, lengthen or shorten the neck strap by using the neck strap adjusters (E).
NOTE: The transponder should rest comfortably on the neck and be contacting your neck at all times – it should not be too tight. The adjustable strap is stretchable to offer flexibility in order for the throat mic to stay in position. Dot not over tighten the straps.
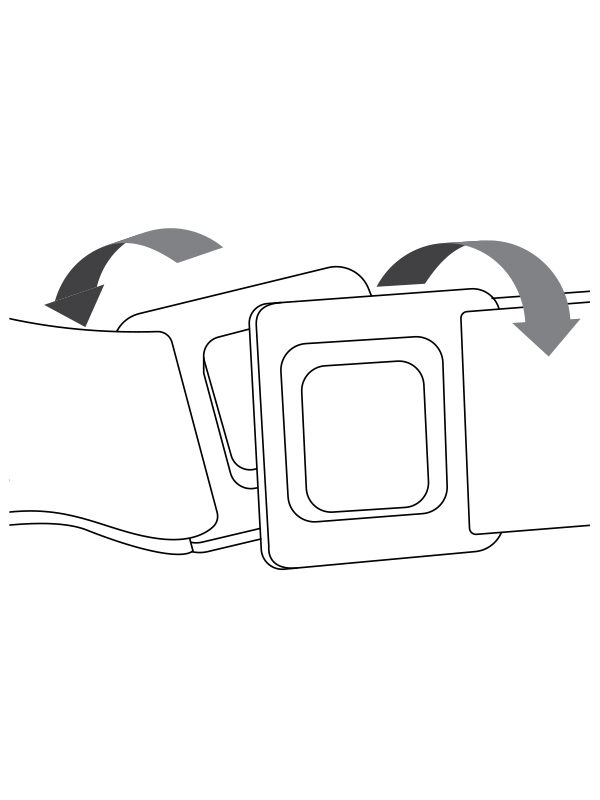
I. Open the magnetic breakway clasp by twisting them apart.
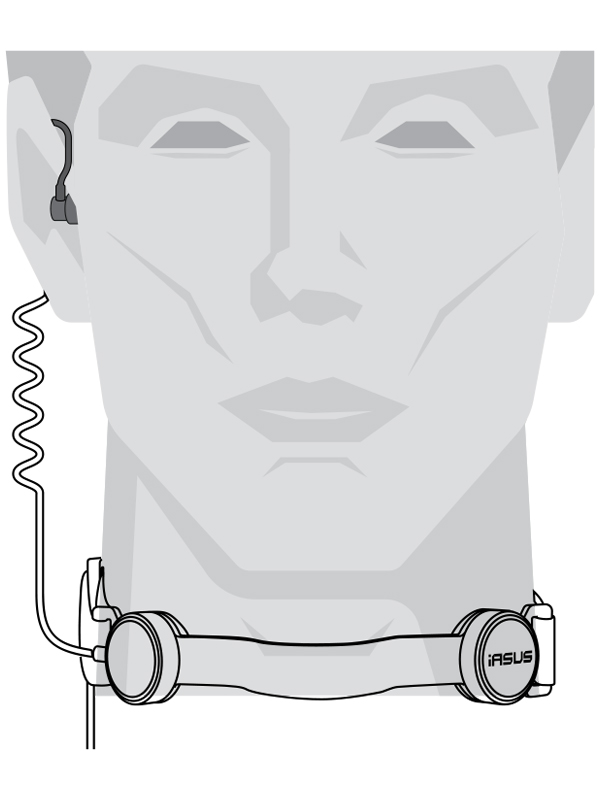
II. Place the throat mic around your neck and reapply the clasp so that it makes contact all around.
III. Adjust the neck strap for tightness by using the adjusters (E). The throat mic needs to be just snug but not tight around your neck.
Initial Use of the Throat Mic (NT3-R and GP3-R)
- Plug the mic cable into the audio input port of your device of choice (2-way radio, smartphone, comms).
- Insert the earpiece (acoustic coil or earbuds) so that it sits comfortably and securely in your ear.
- To talk, push and hold down the PTT (push-to-talk) device (for PTT enabled devices or mobile apps). The button on the M2 adapter is a pick up / end call button by default for smartphones.
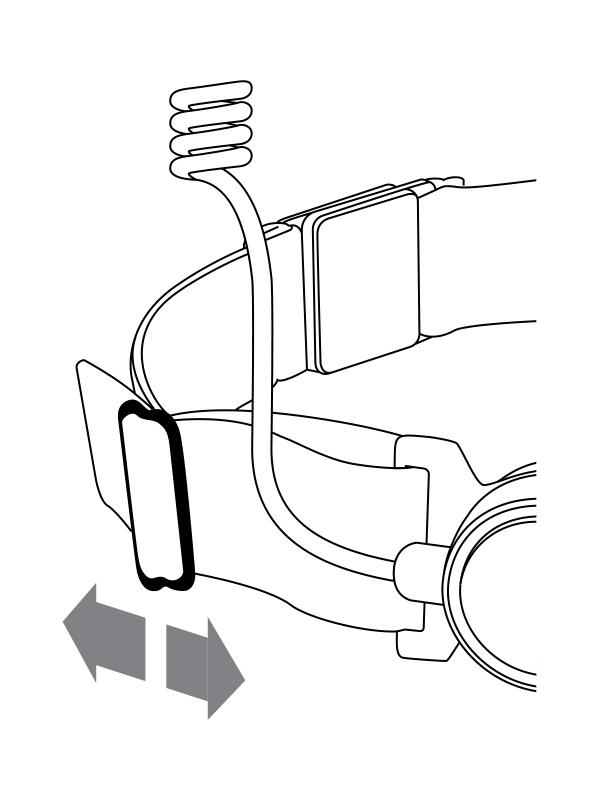
You should keep readjusting the throat strap and testing the unit until you find the sweet spot. It will be different for everyone, depending on factors such as your individual anatomy, voice quality, and facial hair. Moving the transponder closer to your voice box at the center of your throat will boost the volume, but may cause distortion. Everybody has a sweet spot that balances volume and clarity; when you find it, fasten the strap securely at the back.
What Phone or Two-Way Radio is the NT3-R and GP3-R Compatible With?
The NT3-R and GP3-R throat mic system works with most popular smartphones and 2-way radio models. Please refer to our full throat mic compatibility table for details on the required adaptors and compatible model numbers.
Better audio sources such as higher-end radios result in better communication transmission. Certain low-end radios are not up to the performance specifications of our throat mics. We recommend pairing our headsets with higher-powered UHF radios.